Basic p5.js Commands
Programming is the act of giving instructions to a computer. Unlike people, computers are very, very dumb, and can only understand very specific instructions that are written in a very specific way. While we might tell someone to go make a peanut butter and jelly sandwich and leave it at that, when it comes to computers you’d need to specify every single movement precisely and without error. always keep this in mind:
Any time you think to yourself ‘Wow! Computers are really smart,’ remember, computers are very very dumb. People are smart. You’re a person, and no matter what you think, you are infinitely smarter than the fastest, most expensive computer in the world.
Anatomy of a Command
Just about any programming language is built on commands. A command is a set of preprogrammed instructions that the computer and execute. The output of those instructions could turn a motor, generate a number, or turn on a pixel. Since we will be using p5.js, which is a javascript library–a library being a collection of commands–we will look at how commands are written in javascript. However, most programming languages have similarities in how commands are written so don’t worry.
In general a command, or function, will look like this functionName(); First you write the name of the function (usually written in camelCase) followed by by () (pronounced “open, close parens”) and then a : (semi-colon). Many times there will be some things written inside of the the parens, these things are called arguments and they are used as inputs for the function. If this is the case then the function might look like functionName(arg1, arg2...); where the arguments are separated by a ,. Below, we’ll look at some useful functions in p5.js. I’ll do my best to explain them, but if you want more information click on the heading and it will take you to the reference page for that function.
createCanvas()
So p5.js is all about drawing so in order to draw we’ll first need a canvas to draw on. The createCanvas() function makes a digital surface on which you can draw.createCanvas(width, height); takes two arguments, width and height. Once we have our canvas we’ll probably want to draw something on it. There are a lot of different things we can draw, but we’ll start with rectangles, circles, and lines.
rect()
In order to draw a rectangle you can use the rect() function which takes four arguments, x, y, width, height. The first two arguments define the top left corner of the the rectangle. The second two arguments define the width and the height of the rectangle. If we want to draw a rectangle that is 100px wide and 50px tall starting at (10,40) we would write the command rect(10,40,100,50); Here, lets give it a try.
Try changing the some of the arguments in the rect() function. How would you make a square? What happens when you draw a rectangle that is bigger than the canvas?
ellipse()
The ellipse() command takes the same argument structure as rect(). However, instead of the first two arguments defining the x and y of the top left corner, they define the center of the the circle. The next two arguments define the width and height of the ellipse. In this way you can make ovals as well as circles.
line()
The line() command also take four arguments but for this command the first two arguments define the x and y coordinates of the first point and the second two arguments define the x and y coordinates of the second point. In this case, the order doesn’t mater because a line drawn from x1, y1 to x2, y2 is the same as a line drawn from x2, y2 to x1, y1
Comprehension Check
Assignment
For this assignment, you will need to use the p5.js editor; If you haven’t created an account already, do so now.
Your assignment is to convert your drawing that you made for the previous assignment into code. In order to make the drawing visible you will need to multiply all of your coordinates by 20. In addition, add at least one rectangle and one ellipse that is not a circle.
This template will get you started. You’ll notice that there is some extra code there that look like this
function setup(){
  // put all of your code below this line
  createCanvas(600,500);
}
This is a special function definition that is necessary for the code to run properly. We’ll talk more about this in the future, but for now just make sure that all of your code goes inside the { } (curly braces);
When you are finished, make sure you save you sketch and then submit the shareable edit link under the share menu.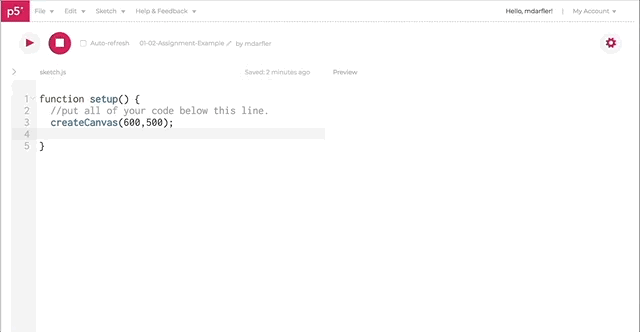
Video Explaination
If you want more information, you can watch this great video about drawing.